Most guides on connecting a Model Context Protocol (MCP) tool to Copilot Studio start at the import screen. That’s the wrong place to start if you’re a Microsoft partner deploying this for a client — because by the time you’re at the import screen, you’ve already committed to a time window, and any missing permission or credential turns a 20-minute job into a two-day back-and-forth.
This guide is built the way we actually run these deployments: a short planning phase to gather everything and confirm access, an execution phase with the steps in the order they work, and a verification phase so there’s a clear definition of done. It also covers the AADSTS50011 redirect URI error that stops most first attempts, and where in the plan to expect it.
What is Model Context Protocol? MCP is an open standard that lets an AI agent call external tools and read external data through one consistent connection instead of a custom integration per tool. In Copilot Studio, a connected MCP tool appears under an agent’s Tools tab alongside flows and connectors.
Phase 1: Plan Before You Touch the Environment
The goal of this phase is to make the execution phase boring. Everything below should be confirmed before a deployment window is booked.
Confirm who has which access
Deploying an MCP tool touches three different admin surfaces, and it’s common for no single person to have all three:
- Power Platform environment — someone with rights to import a managed solution into the target environment.
- Copilot Studio — a maker with access to the agent in that same environment.
- Azure AD / Microsoft Entra — someone who can edit the app registration’s Authentication settings. This is the one that’s most often missing, and it’s the one you’ll need mid-deployment when the redirect URI error appears.
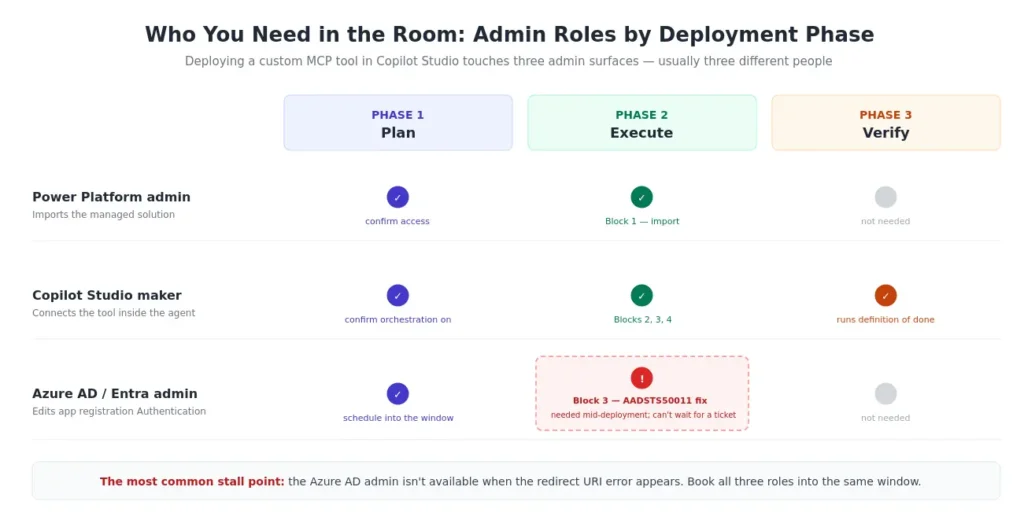
If those are three different people, schedule them into the same window. The redirect URI fix in particular cannot wait for a ticket to be raised.
Gather the inputs
Before the window:
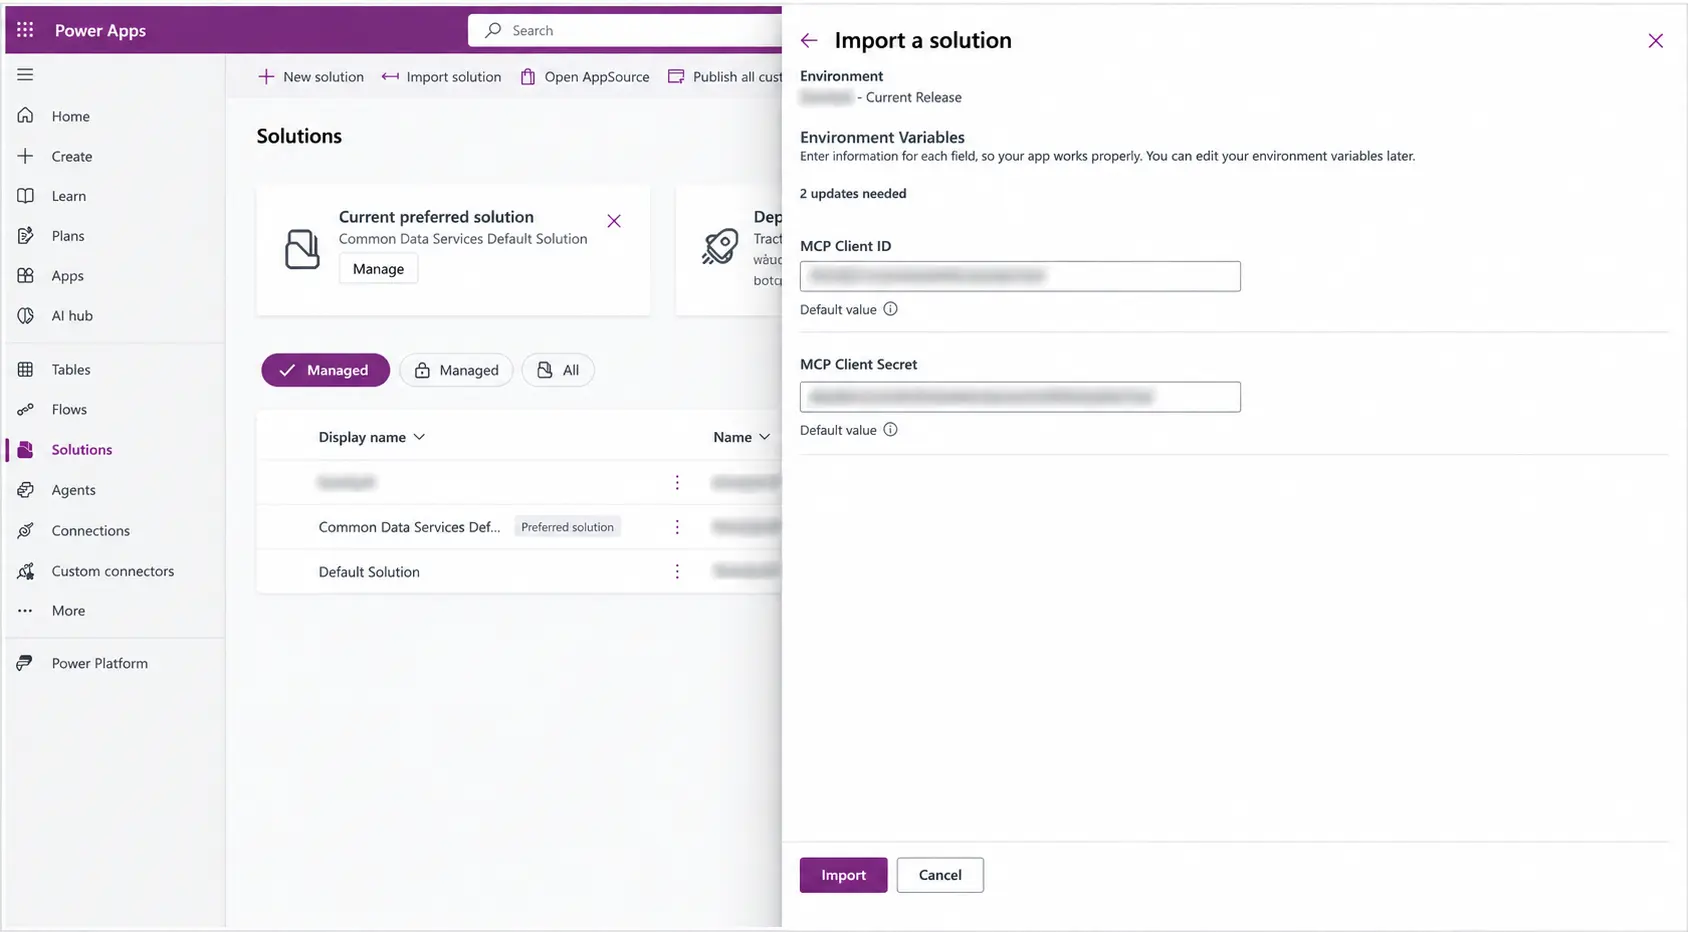
- The managed solution ZIP for the correct release — confirm it’s the managed package, not unmanaged, and note the expected name, publisher, and version so you can verify them on import.
- The MCP client ID and client secret that the solution’s environment variables expect. Confirm they exist and are current. Don’t plan to regenerate them during deployment.

- The app registration name in Azure AD tied to this tool, so you can find it quickly.
- Confirmation that generative orchestration is enabled on the agent — MCP tools require it.
Decide the channel and audience
Decide up front whether the agent will be published to Microsoft 365 Copilot and Teams, and who should be able to add it. This is a separate step from the MCP connection and is easy to forget, which leaves a working agent that no one can find.
Set a definition of done
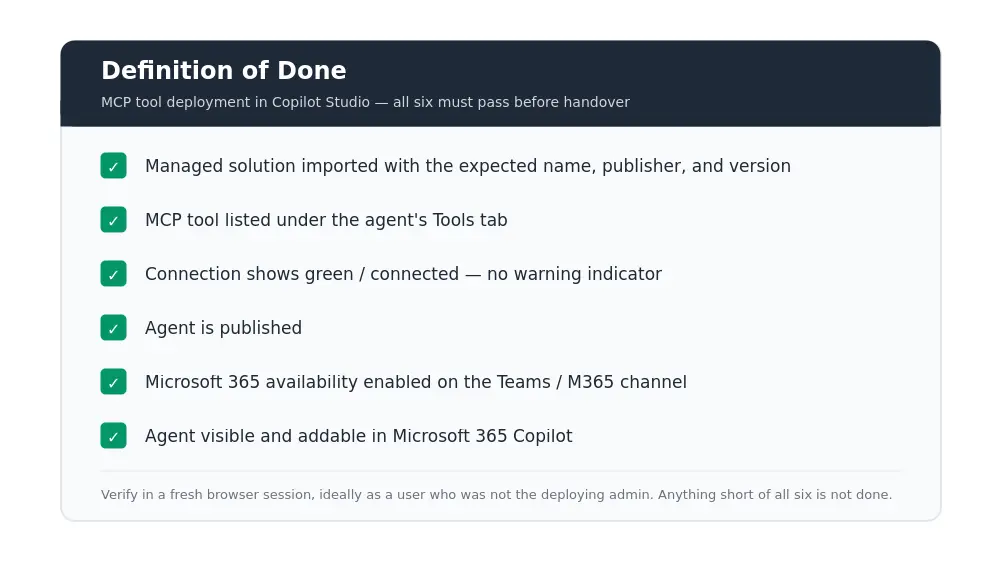
Write down what “finished” looks like before you begin. For this deployment it’s: solution imported, MCP tool listed under Tools, connection green with no warning, agent published, channel enabled, and agent added in Microsoft 365 Copilot. Anything short of all six is not done.
Phase 2: Execute
With planning complete, the execution phase runs in four blocks. Expect the third block to produce an error — that’s normal, and the plan already accounts for it.
Block 1 — Import the solution
In Power Apps, select the target environment and choose Import solution from the Solutions area. Browse to the managed ZIP, confirm it’s the managed package, and continue. Verify the solution name, type, publisher, and version match what you noted in planning. Leave Enable Plugin steps and flows included in the solution selected.
When the wizard shows environment variables, confirm the client ID and client secret values are present. Don’t edit them. Import, and wait for the success notification.
Block 2 — Open the agent and locate the tool
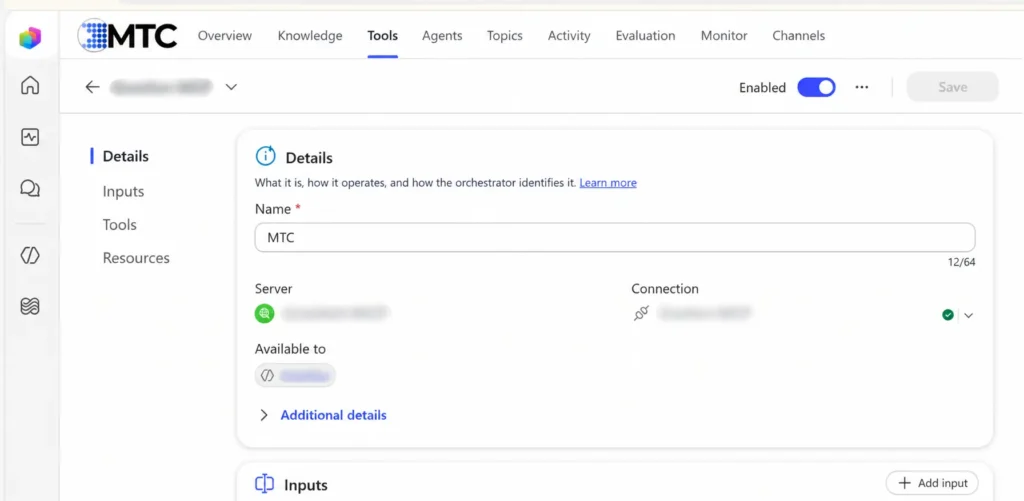
Open the imported solution, select Agents, and open the agent. In Copilot Studio, go to Tools and confirm the MCP tool appears under Model Context Protocol. Select it to open its connection details.
Block 3 — Create the connection (and fix the redirect URI error)
If the Connection field shows “Not connected,” open the connection menu, choose Create new connection, keep an appropriate display name, and click Create. A sign-in window opens.
If sign-in fails with AADSTS50011, the redirect URI in the request isn’t registered in the app registration. The fix is to copy the exact URI from the error, add it under the app registration’s Authentication settings as a Web redirect URI, then reconnect.
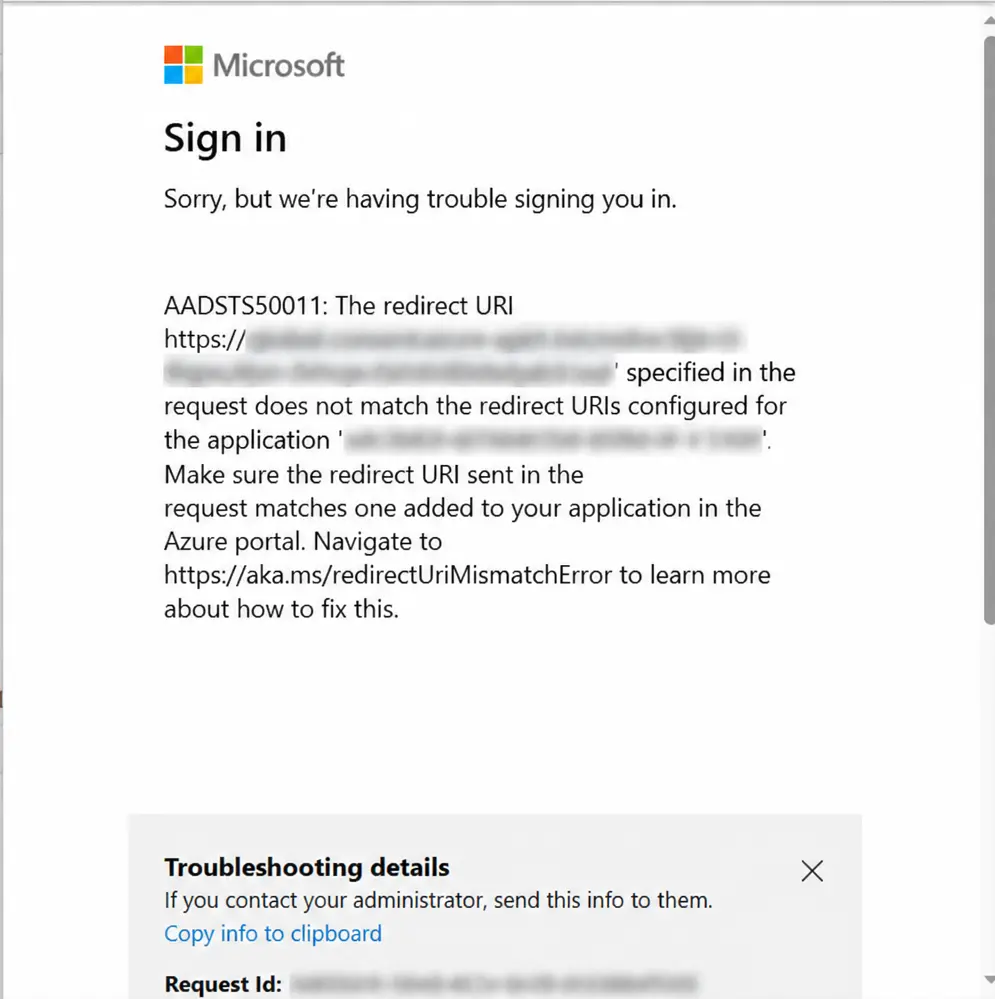
This is expected on a first connection and is not a credentials problem — leave the client ID and secret alone.
Here’s the sequence, with the Azure AD admin from Phase 1 ready:
- Copy the full redirect URI from the error message exactly as displayed. Don’t copy any credential values.
- In the Azure portal, open the app registration, select Authentication under Manage, click Add Redirect URI, choose the Web platform, paste the URI, and click Configure. Check spelling and path character by character — a trailing slash mismatch reproduces the same error.
- Back in Copilot Studio, cancel the earlier sign-in attempt. The connection menu will show a warning — expected, since that attempt started before the URI existed.
- Open the connection menu and click Reconnect. If it doesn’t complete cleanly, use Create new connection and sign in again.
- Confirm the connection shows green/connected with no warning before moving to Block 4.
Block 4 — Publish and enable the channel
Return to the agent, open Channels, and confirm the agent is published. Under Microsoft channels, open Microsoft 365 and Microsoft Teams, leave Make agent available in Microsoft 365 Copilot selected if that was the decision in planning, and save. Click See agent in Microsoft 365 to open the Agent Store, review the details, and click Add.
Phase 3: Verify and Hand Over
Run the definition-of-done from Phase 1 as a checklist, in a fresh browser session, ideally as a user who was not the deploying admin:
- Managed solution imported with the expected name and version
- MCP tool listed under the agent’s Tools
- Connection shows green with no warning
- Agent is published
- Microsoft 365 availability enabled
- Agent visible and addable in Microsoft 365 Copilot
If any line fails, the fix is almost always in Block 3 or Block 4 — not in the import.
Problems This Solves
Problem: Deployments stall mid-window because the person who can edit the Azure AD app registration isn’t available. How this solves it: Planning phase identifies all three admin roles and schedules them into the same window before anything is imported.
Problem: Teams treat the AADSTS50011 error as a failure and start regenerating credentials. How this solves it: The plan treats the error as an expected step in Block 3, with the fix pre-staged, so no one touches the client secret.
Problem: The MCP connection works but the agent isn’t reachable by users. How this solves it: Channel publishing is a separate, planned block with its own decision made up front, not an afterthought.
Problem: No one can say with confidence whether the deployment is actually complete. How this solves it: A written definition of done, agreed before starting, becomes the handover checklist.
Frequently Asked Questions
Why is MCP worth the setup effort for a Copilot Studio agent?
Gartner’s research on Model Context Protocol describes it as an open standard that lets AI agents access external data and tools without a custom integration for each one. For a partner delivering agents to multiple clients, that translates to one connection pattern to plan, document, and support — rather than a bespoke integration every time a client needs a new tool.
How much planning is appropriate before deploying a Copilot Studio agent?
Gartner analyst Kyle Davis’s research on building AI assistants in Copilot Studio stresses learning the platform’s patterns and best practices before scaling past a single use case. The planning phase in this guide is the practical version of that advice: confirming access, inputs, and a definition of done before the deployment window, so the execution phase surfaces no surprises.
Conclusion
The difference between a 20-minute MCP deployment and a two-day one is almost never the technology — it’s whether the redirect URI fix was anticipated and whether the right admin was in the room. Plan the three access roles, gather the inputs, decide the channel, and write the definition of done. The execution then runs the way it should.
If you’re deploying MCP tools into client Copilot Studio environments and want a repeatable runbook for it, MTC’s Power Platform and AI Foundry team is happy to compare notes.