12-minute read — for Microsoft partners and D365 implementation teams
Most Microsoft partners know that Dynamics 365 Customer Service live chat is part of the platform. Fewer have fully configured the engine that makes it genuinely powerful — skill-based routing, Copilot AI triage, and work classification rules that route every incoming chat to exactly the right agent, automatically.
This post walks through the full setup: from creating skills and queues, to configuring a live chat workstream, to connecting a Copilot agent that handles first contact and hands off to a human with full context intact.
Everything here is based on a working MTC demo built on Dynamics 365 Customer Service and the Copilot Service Admin Center.
What you’ll learn in this guide:
- How to define skills and assign them to agents
- How to configure a live chat workstream end-to-end
- How to build work classification and routing rules
- How to connect a Copilot AI agent for first-line triage
- How to use routing diagnostics to debug live issues
What the Setup Covers
At a high level, a well-configured D365 live chat implementation involves five interconnected layers:
- Skills and user management — defining what each agent is qualified to handle
- Queues — grouping agents by expertise so the right team receives the right work
- Live chat workstream — the container that holds your chat channel configuration
- Work classification rules — logic that reads incoming context and tags the work item
- Routing rules — directs the tagged work item to the right queue
Layer in a Copilot AI agent on top and you have a contact centre that triages, classifies, and routes chats before a human agent ever sees them.
Step 1 — Define Skills in Dynamics 365 Customer Service
The first step is to define the Active Characteristics (skills and certifications) that agents in your organisation hold.
In the Copilot Service Admin Center, navigate to User Management → Skills. Here you create individual skill records — for example, Samsung Ink Cartridge, Canon Paper Tray, Buttons — and assign each skill to the relevant bookable resources (agents), with a proficiency rating such as Excellent, Good, or Average.
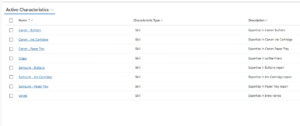
Active Characteristics — Skills list in Copilot Service Admin Center
Once skills are created, go to Enhanced User Management. Here you can see each agent’s full skill profile alongside their capacity units and capacity profiles. An agent might have 100 capacity units total — meaning the system can assign multiple simultaneous chat sessions up to that ceiling, deducting units per active work item.
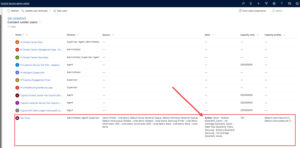
Enhanced User Management — agent skill profile
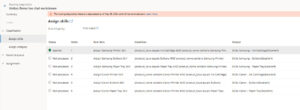
Skill assignment with proficiency ratings
Why this matters for partners: Skill-based routing only works if the skill data is accurate and up to date. When implementing for a client, build a process to review and update agent skill profiles regularly — not just at go-live.
Step 2 — Create Queues Mapped to Expertise Areas
With skills defined, create Queues that correspond to your client’s support areas.
In the demo, two queues were created: one for Samsung printer support and one for Canon printer support. All agents with Samsung printer expertise are assigned to the Samsung queue, and Canon experts to the Canon queue. When a work item arrives and is classified as a Samsung issue, it routes to the Samsung queue — where only qualified agents will receive the push notification.
There is also a fallback queue — the queue that receives work items when no classification rules match. This prevents work items from being stuck unassigned. Any available agent can pick these up, or a supervisor can manually assign them.
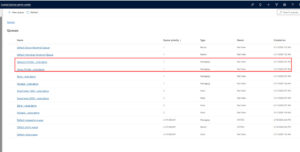
Queue list — Samsung Printer and Canon Printer queues visible
Routing queue design tip: For most Microsoft partner clients, start with three to five queues that reflect the client’s primary support categories. Avoid over-segmenting at go-live — you can always add queues as volume data shows where the gaps are.
Step 3 — Configure the Live Chat Workstream
The workstream is the foundational block of your D365 live chat implementation. Before any work classification or routing can happen, the workstream must exist.
A workstream is a container that:
- Defines the channel type (in this case, messaging)
- Holds one or more chat channels of the same type
- Passes its configuration to all channels created within it
Navigate to Workstreams in the Copilot Service Admin Center, then open or create your live chat workstream. Inside, you will find the chat channel configuration — this is where the majority of the live chat setup lives.
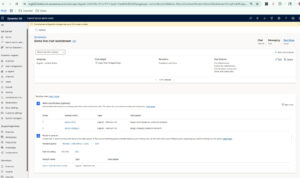
Demo Live Chat Workstream — channel configuration panel with live preview
Key Chat Channel Settings
Within the chat channel editor, you have control over:
Widget appearance — window size (compact, full, or custom with pixel dimensions), window position and offset from screen corners, and header/conversation/input area colours. A preview renders in real time as you make changes.
Widget header — choose between graphic only, text only, or both. You can upload a custom icon to replace the default.
Embed script — once configured, the chat widget generates a JavaScript snippet you copy and embed on the client’s website. This is what renders the chat bubble.
Proactive chat — configure the system to automatically trigger a chat prompt after a visitor has spent a defined amount of time on the site, turning passive browsers into active conversations.
Reconnect to previous chat — if a customer is disconnected mid-conversation, this setting allows them to reconnect to the same agent without losing the conversation thread.
Operation hours — restrict the widget to only appear during defined business hours. Critical for clients who do not offer 24/7 support.
Domain restriction — limit the widget to specific approved domains only, preventing the embed script from being used on unauthorised sites.
Behaviour Settings
Inside the channel’s behaviour tab:
- Pre-conversation survey — collect structured information from the customer before connecting to an agent. This feeds context variables directly into the routing logic.
- Post-conversation survey — send a satisfaction survey at the close of each chat session. Integrates with Dynamics 365 Customer Voice for full feedback capture.
- Authentication settings — enforce authenticated sessions to block anonymous or bot traffic from consuming queue capacity.
- Wait time display — show customers their position in queue or estimated wait time so they can make an informed decision to wait or return later.
- Customer location detection — request the customer’s location for geo-aware routing or context enrichment.
User Features
- Attachment support — allow customers and agents to exchange files within the chat
- Customer notifications — unread message counts and sound alerts
- Transcript download and email — customers can receive a full chat transcript at session end
- Voice and video calls — escalate a text chat to a voice or video call without leaving the interface
- Screen sharing and co-browsing — via third-party add-ons, agents can view and annotate the customer’s screen directly
Step 4 — Build Work Classification Rules
Work classification is the intelligence layer that reads incoming context variables and attaches attributes to the work item before routing begins.
In the workstream, navigate to Work Classification. You will find two types:
Assign Skills — defines rules that attach skill requirements to the work item. For example:
If
Product NamecontainsSamsung Printer→ assign skillSamsung Ink Cartridge: Excellent
When the routing engine then looks for an available agent, it finds an agent who holds the Samsung Ink Cartridge skill at the Excellent level and routes the work item to them.
Assign Category — defines rules that tag work items with a customer category. For example:
If
Customeris not equal to a specified high-value segment → assign categoryStandard
This allows priority-based routing where preferred customers receive faster response times automatically.
You can create as many classification rules as needed. Each rule evaluates against the context variables collected during the Copilot AI agent conversation or pre-conversation survey — so the richer your upfront data collection, the more precisely you can classify and route.
For deeper configuration guidance, Microsoft provides detailed documentation on unified routing in Microsoft Learn
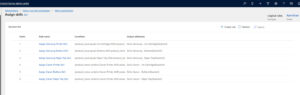
Work Classification — Assign Skills rule editor
Skill matching algorithm: The workstream lets you choose between Exact Match (the agent must hold precisely the required skill) and Closest Match (the system finds the nearest available match). For most implementations, Closest Match reduces wait times significantly without sacrificing service quality.
Step 5 — Set Routing Rules and Work Distribution
With classification in place, Routing Rules define which queue a classified work item is sent to.
In the demo, two routing rules were configured:
- If
Product NamecontainsSamsung Printer→ route to Samsung Printer queue - If
Product NamecontainsCanon Printer→ route to Canon Printer queue
Routing Rule Set — queue routing rules
Route to Queue configuration
Hit Policy
The workstream offers two hit policies:
Hit First — the system evaluates routing rules in priority order and routes to the first matching queue. Efficient and predictable for most setups.
Hit All — the system evaluates all rules and overflow conditions. If no queues have overflow, it routes to the first matching queue. If all queues are overflowing, it routes to the first available queue. Use this for high-volume environments with complex overflow logic.
Work Distribution
Set the work distribution mode to Push for live chat — this sends a real-time notification to available agents when a new work item is assigned to their queue. Agents can accept or decline within a configurable timeout window.
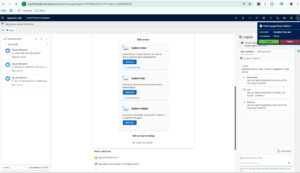
Chat notification — incoming chat request with Accept/Reject prompt and countdown timer
Capacity per work item — define the capacity units consumed per active chat session. In the demo, each chat consumes 30 units from the agent’s 100-unit total, meaning an agent can handle up to three simultaneous chats.
Wrap-up state — after closing a chat, agents enter a wrap-up period during which their capacity is still partially consumed. This gives agents dedicated time to complete case notes, link accounts, or create follow-up records without being immediately assigned the next chat.
Route to User — agent assignment configuration
Step 6 — Connect a Copilot AI Agent for First-Line Triage
This is where the setup moves from functional to genuinely intelligent.
In the workstream, there is an AI Agent section where you attach a Copilot Studio agent to handle the first interaction with every customer before routing to a human.
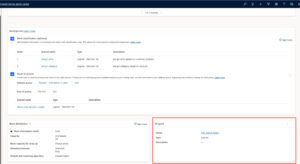
Demo Copilot Agent — connected to the live chat workstream
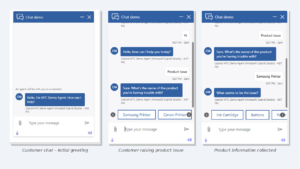
The demo used a custom Copilot Studio agent with topics configured to:
- Greet the customer and ask about their issue
- Collect the product name and symptom
- Use that structured data to trigger the work classification logic
- Escalate to a human agent with full conversation context transferred
When the escalation happens, the agent in the Customer Service Workspace sees:
- The complete conversation history with the Copilot agent
- The pre-populated context variables (product name, issue type)
- A real-time AI-generated conversation summary so they do not have to read the full transcript
- Customer sentiment — a live indicator that updates as the conversation continues, moving from Neutral to Positive or Negative based on message tone

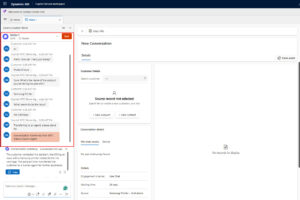
Communication panel — conversation history, sentiment indicator, and AI summary
This eliminates the most common frustration in customer service: having to repeat the problem to a human after already explaining it to a bot.
Step 7 — The Agent Workspace in Action
Once an agent accepts the work item, they work inside the Customer Service Workspace.
Key capabilities available to the agent during a live chat session:
Account lookup and creation — if the customer is already in the system, their account auto-populates. If not, the agent can create a new account record without leaving the chat session.
Timeline and pre-chat survey data — the right panel shows the customer’s timeline, the engagement channel, wait time, browser, and device information.
Quick replies — pre-built response templates that agents can insert with a single click, reducing handle time for common queries.
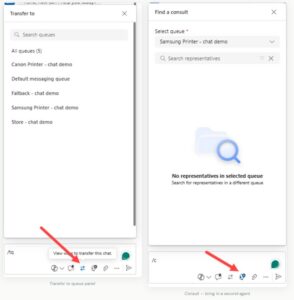
Transfer to queue — if the agent determines the chat should be handled by a different team, they can transfer the work item to another queue mid-conversation.
Consult — pull in a second agent (for example, from accounting or technical support) to collaborate on resolving the issue without transferring ownership.
Notes and rich messages — agents can take session notes and send formatted messages within the chat.
Voice and video escalation — the conversation can be escalated to a voice or video call when the complexity requires it.
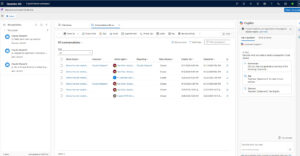
Customer Service Workspace – the app that every service rep accesses everyday
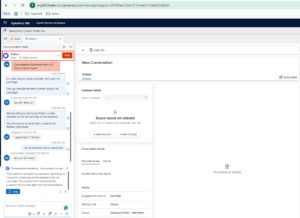
Live chat session active in agent workspace
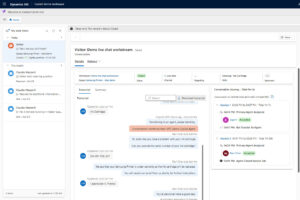
Closed conversation with full transcript stored
Routing Diagnostics — Understanding What Happened and Why
After a session closes, Routing Diagnostics gives you full visibility into every routing decision made during that work item’s lifecycle.
This is one of the most underused features in D365 Customer Service — and one of the most valuable for implementation partners. When clients report that a chat was routed incorrectly, routing diagnostics shows exactly:
- Which Work Classification tab — rules that fired and what attributes were assigned
- Which routing rule set was evaluated and which rule matched
- Which queue the item was assigned to and why
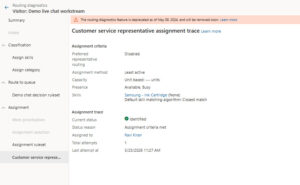
- Which agent was selected and on what basis
This turns debugging from guesswork into a structured audit trail.

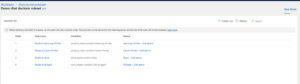
Routing Diagnostics — full overview showing all decision points
Work Classification tab — rules that fired
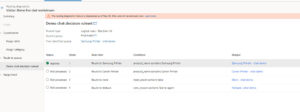
Route to Queue Ruleset tab
Queue assignment result
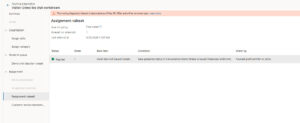
Agent Assignment tab — why this agent was selected
Frequently Asked Questions
Can multiple chat channels share the same workstream?
Yes. A single workstream can contain multiple chat channels of the same type (messaging). All channels within the workstream inherit the same base configuration, including classification and routing rules. This is the recommended pattern when a client has multiple websites or customer touchpoints that should share the same routing logic.
What is the difference between skill-based routing and queue-based routing?
Queue-based routing directs work items to a group of agents. Skill-based routing goes further — within that queue, it identifies which specific agent holds the required skill at the required proficiency level and routes directly to them. You can use both in combination: classify by skill, route to queue, then let the assignment logic within the queue match to the best-fit agent.
Does the Copilot agent require a separate Copilot Studio licence?
Yes. The AI agent is built in Copilot Studio and requires the appropriate Copilot Studio licensing. It connects to D365 Customer Service via the AI Agent section of the workstream and appears in Omnichannel as a connected agent. Consult Microsoft’s current licensing documentation for the latest requirements.
You can review Microsoft’s official licensing guidance in Microsoft’s Copilot Studio licensing documentation
How does customer sentiment work?
Sentiment analysis runs continuously throughout the conversation. It reads the customer’s messages and updates the sentiment indicator (Negative, Neutral, Slightly Positive, Positive) in real time on the agent’s communication panel. Agents can use this as a cue to adjust their communication style. Supervisors can monitor sentiment across all live sessions from the Omnichannel supervisor dashboard.
What happens to the chat transcript after a session ends?
The full transcript is stored against the conversation record in D365. Agents can download it from the session panel. Customers can be offered a download link or email copy at the point of conversation closure, depending on how the channel’s transcript settings are configured.
Conclusion
A well-implemented D365 Customer Service live chat setup is not just a chat widget on a website. It is a connected system of skills, queues, classification logic, and AI triage that routes every customer to the right agent, with the right context, in the shortest possible time.
For Microsoft partners building or extending D365 Customer Service for clients, the configuration depth covered here — from Active Characteristics through to Routing Diagnostics — is what separates a basic implementation from one that genuinely reduces handle time, improves CSAT, and scales with the client’s support volume.
MTC has delivered Dynamics 365 Customer Service implementations for Microsoft partners across legal, financial services, and general enterprise. With 80+ D365 consultants in our Hyderabad delivery hub and 24–48 hour mobilisation, we plug into partner programs without lengthy onboarding.
If your firm is scoping a live chat or omnichannel contact centre implementation and needs delivery capacity, talk to MTC’s D365 CE team — or explore our 25+ AppSource add-ons built on D365 CE.